Support our educational content for free when you buy through links on our site. Learn more
🤖 Master Robot Fighting Hydraulics: The Ultimate 2026 Guide
Ever watched a BattleBot flip a 250-pound opponent with the flick of a wrist and wondered, “How is that even possible?” The secret isn’t magic; it’s robot fighting hydraulics. While kits like the “Squirrel Showdown” from CrunchLabs offer a fun introduction to fluid power, true mastery requires understanding the deep engineering principles that turn simple water pressure into brute force. In this comprehensive guide, we strip away the mystery, taking you from the basic physics of Pascal’s Law to the advanced techniques used by professional combat engineers to build lethal lifting arms and unbreakable wedges.
We’ve seen too many DIY projects fail because of a single trapped air bubble or a poorly placed pivot point. That’s why we’re sharing the insider secrets of the Robot Fighting™ team. Whether you are a student building a Judo Bot for a science fair or an enthusiast aiming to dominate the local arena, this article covers every aspect of hydraulic combat design. We’ll reveal why your robot might be sliding instead of lifting, how to calculate the perfect force-to-speed ratio, and the specific materials that separate a broken toy from a championship contender.
Key Takeaways
- Hydraulics vs. Pneumatics: Understand why liquid-based systems provide the rigid, high-torque control essential for robot combat, unlike compressible air systems.
- The Air Bubble Trap: Learn the critical technique for bleding air from your system, the #1 cause of weak performance in homemade hydraulic arms.
- Force Multipliers: Discover how to manipulate syringe diameters to create massive lifting power or rapid striking speed based on your match strategy.
- Friction is King: Realize that a stable base with optimized friction points is often more important than raw power in preventing your robot from sliding out of the ring.
- Pro-Level Materials: Move beyond craft sticks to explore aluminum, steel, and high-grade hydraulic oil for serious combat robot builds.
Ready to build? Whether you start with a CrunchLabs Squirrel Showdown kit or design from scratch, mastering these principles is your first step toward victory.
Table of Contents
- ⚡️ Quick Tips and Facts
- 📜 A Brief History of Hydraulic Power in Robot Combat
- 🧠 The Science Behind the Smash: How Robot Fighting Hydraulics Work
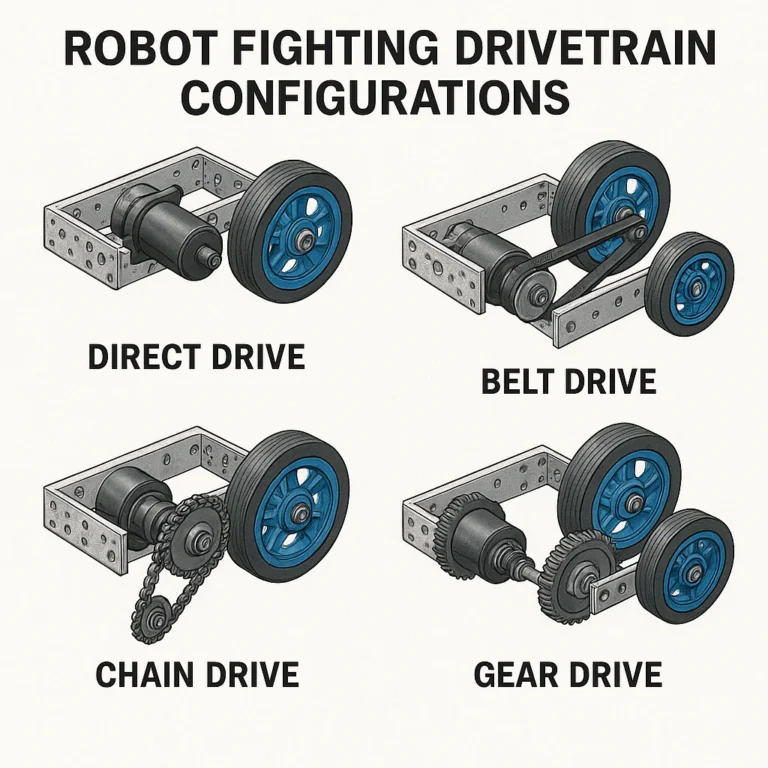
- 🛠️ Essential Components for Building a Hydraulic Combat Robot
- 🏗️ Step-by-Step Guide to Constructing Your Hydraulic Fighter
- Step 1: Selecting the Right Materials and Tools
- Step 2: Designing the Chassis and Base
- Step 3: Engineering the Stand and Pivot Points
- Step 4: Crafting the Lifting Arm and Wedge
- Step 5: Asembling the Mechanical Frame
- Step 6: Building the Hydraulic Power System
- Step 7: Integrating Hydraulics with the Lifting Arm
- Step 8: Mounting the System to the Stand
- ⚖️ Official Judobot Match Rules and Safety Regulations
- 🎓 Presenting Your Hydraulic Robot Project to the Class
- 🚀 Advanced Techniques: Boosting Torque and Speed
- 🏆 Troubleshooting Common Hydraulic Leaks and Failures
- 💡 Real-World Applications: From BattleBots to Industrial Arms
- 👥 Community Spotlight: Projects Made by Enthusiasts
- 🏅 The Ultimate Hydraulic Robot Design Contest
- 🎨 Visual Effects and STEM Education Student Challenge
- 📚 Recommended Links for Builders and Fans
- ❓ Frequently Asked Questions About Robot Fighting Hydraulics
- 🔗 Reference Links and Technical Sources
- 🏁 Conclusion
⚡️ Quick Tips and Facts
Welcome to the arena, builders! Before we dive into the nitty-gritty of hydraulic pressure and fluid dynamics, let’s hit the ground running with some golden nugets of wisdom from the Robot Fighting™ engineering team. If you’ve ever wondered why your homemade robot arm feels like it’s moving through molasses, or why your opponent’s wedge launches you into the stratosphere, these facts are your first line of defense.
- Air is the Enemy: The single most common mistake beginners make is leaving air bubbles in the system. As one of our veteran builders put it, “There should be very little air inside the syringes and tubing… otherwise the hydraulic systems won’t be as powerful.” Air compresses; water does not. If you want brute force, you need a liquid-filled system.
- Friction is Your Friend (and Foe): In a Judo Bot match, you don’t just want to lift; you want to stay put. Adding friction points (like dried hot glue blobs) to the bottom of your base is a game-changer. It prevents your robot from sliding out of the ring when the opponent pushes.
- Geometry Matters: A wider base equals a stable base. If your robot tips over every time it fires a piston, you’re fighting a losing battle. The center of gravity must be low and centered.
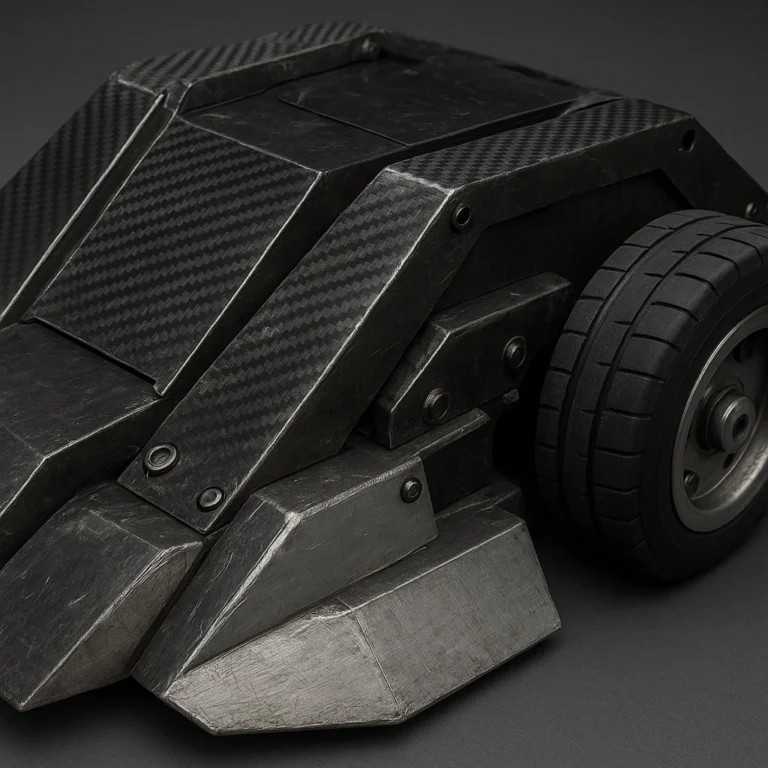
- Material Limits: Craft sticks are great for learning, but they have a breaking point. In professional BattleBots, we use steel and aluminum, but for DIY, understanding the tensile strength of wood is crucial.
- The “Squeeze” Factor: The diameter of your syringes dictates your force vs. speed ratio. A small syringe pushing a large one gives you massive force but slow movement. A large pushing a small gives you speed but less power. Choose wisely!
Did you know? The concept of hydraulics dates back to ancient Egypt, but it wasn’t until the 19th century that Joseph Bramah patented the hydraulic press, paving the way for the modern robot combat machines we see today.
For a deeper dive into the philosophy of combat design, check out our guide on Robot Fighting.
📜 A Brief History of Hydraulic Power in Robot Combat

The story of robot fighting hydraulics is a tale of evolution from simple levers to high-pressure fluid power systems. While early BattleBots relied heavily on electric motors and pneumatics (compressed air), the demand for higher torque and smother control pushed engineers toward hydraulics.
The Rise of the Fluid Power
In the early days of the Robot Fighting League, electric actuators were the norm. They were clean, easy to control, and didn’t leak. However, when builders wanted to create heavy lifting arms or spinning weapons that could withstand the impact of a 10-pound opponent, electricity often fell short. The power-to-weight ratio of electric motors just couldn’t match the raw force density of hydraulics.
From Industrial Arms to Battle Arenas
The technology wasn’t invented for robots; it was borrowed from industrial machinery. Think of the massive cranes and excavators that move tons of earth. Engineers realized that by scaling down these hydraulic cylinders and pumps, they could create combat robots capable of flipping opponents with ease.
Fun Fact: The Squirrel Showdown kit from CrunchLabs is a perfect example of how these industrial principles are being democratized for education. It teaches the fundamentals of fluid power using simple materials, bridging the gap between a child’s toy and a professional BattleBot.
As we moved into the modern era, hydraulic systems became the gold standard for heavyweight and super heavyweight classes. The ability to deliver instantaneous torque without the lag of electric motors made them the weapon of choice for wedges, lifters, and flippers.
🧠 The Science Behind the Smash: How Robot Fighting Hydraulics Work
So, how does a little bit of water in a plastic tube turn into a robotic fist of fury? It’s all about Pascal’s Law.
Pascal’s Law Explained
Simply put, pressure applied to a confined fluid is transmitted undiminished in all directions. When you push the plunger of a master syringe, you create pressure in the fluid. This pressure travels through the tubing to the slave syringe, forcing its plunger out with the same pressure.
Force Multipliers
Here is where the magic happens. If your master syringe has a small surface area and your slave syringe has a large surface area, you get a mechanical advantage.
- Small Master + Large Slave: High Force, Low Speed. (Perfect for lifting heavy opponents).
- Large Master + Small Slave: Low Force, High Speed. (Good for quick strikes).
The Role of Fluids
While water is the most common fluid for DIY projects, professional combat robots often use hydraulic oil. Why?
- Lubrication: Oil lubricates the seals, reducing friction and wear.
- Corosion Prevention: Water can rust metal parts; oil does not.
- Compressibility: While both are largely incompressible, oil handles temperature changes better.
Visualizing the System
| Component | Function | DIY Equivalent | Pro Equivalent |
|---|---|---|---|
| Master Cylinder | Input force generation | Plastic Syringe | Hydraulic Pump |
| Slave Cylinder | Output force execution | Plastic Syringe | Hydraulic Cylinder |
| Tubing | Fluid transmission | Vinyl tubing | High-pressure hose |
| Fluid | Power transmission medium | Water | Hydraulic Oil |
| Seals | Prevent leaks | O-rings (or tight fit) | Piston Seals |
Curiosity Check: Why do some robots use pneumatics (air) instead of hydraulics? Air is compressible, which acts like a spring. This can be great for bounciness but terrible for precision lifting. Hydraulics are rigid, making them superior for controlled combat maneuvers.
🛠️ Essential Components for Building a Hydraulic Combat Robot
Building a hydraulic robot requires a specific set of tools and materials. Whether you are a student building a Judo Bot or a hobbyist constructing a mini-BattleBot, you need the right gear.
Core Components
- Syringes: The heart of your system. Look for Luer-lock syringes for a secure connection.
Recommendation: BD Syringes are widely available and durable.
👉 Shop BD Syringes on: Amazon | Walmart | BD Official - Tubing: Needs to be flexible yet strong enough to withstand pressure.
Recommendation: Vinyl tubing (1/4″ or 3/16″ inner diameter) is the standard for DIY.
👉 Shop Vinyl Tubing on: Amazon | Walmart - Structural Materials:
DIY: Craft sticks, wooden cubes, hot glue.
Pro: Aluminum extrusion, steel plate, 3D printed parts (PLA or ABS). - Connectors: To join syringes to tubing without leaking.
Tip: You can often use the syringe tip itself if it fits snugly, or use Luer-lock adapters.
Tools You’ll Need
- Hot Glue Gun: Essential for DIY structural integrity.
- Drill and Bits: For creating pivot points.
- Pliers: For bending wire and removing air bubbles.
- Soldering Iron (Optional): For sealing tubing ends if needed.
Pro Tip: When selecting syringes, ensure they are airtight. A leaky syringe means a weak robot. Test them by filling with water and squeezing before you start building.
For more on selecting the right materials, visit our Robot Design and Engineering category.
🏗️ Step-by-Step Guide to Constructing Your Hydraulic Fighter
Ready to build? Let’s break down the process into manageable steps. This guide is inspired by the Hydraulic Judo Bots concept but expanded for maximum combat effectiveness.
1. Step 1: Selecting the Right Materials and Tools
Before you cut a single stick, plan your design criteria.
- Size Constraints: Most DIY competitions limit the robot to a 10×10 inch square.
- Weight Limits: Keep it light! Heavy robots are hard to lift.
- Material Choice: Will you use wood for simplicity or 3D printed parts for precision?
2. Step 2: Designing the Chassis and Base
The base is your foundation.
- Stability: Create a wide, flat base.
- Friction: Add hot glue pads to the bottom to prevent sliding.
- Pivot Point: Decide where your arm will rotate. Front-mounted pivots allow for lunging, while rear-mounted pivots offer better leverage for lifting.
3. Step 3: Engineering the Stand and Pivot Points
The stand holds your arm.
- Durability: Use a strong dowel or metal rod for the pivot.
- Low Friction: Ensure the arm can rotate freely. A little lubricant on the pivot point helps.
- Alignment: The pivot must be perfectly vertical, or your arm will bind.
4. Step 4: Crafting the Lifting Arm and Wedge
This is your weapon.
- Shape: A wedge shape helps slide under opponents.
- Reinforcement: Double up on craft sticks or use thicker materials for the arm.
- Attachment: Ensure the arm connects securely to the slave syringe.
5. Step 5: Asembling the Mechanical Frame
Put it all together.
- Glue Carefully: Hot glue sets fast. Work quickly but precisely.
- Check Alignment: Before the glue dries, ensure the arm moves smoothly.
- Secure Connections: Make sure all syringes are firmly attached to the frame.
6. Step 6: Building the Hydraulic Power System
Now for the magic.
- Fill with Water: Fill the master syringe and tubing with water.
- Remove Air: This is critical! Tap the tubing to move bubbles to the top and push them out.
- Connect: Attach the slave syringe and ensure the system is sealed.
7. Step 7: Integrating Hydraulics with the Lifting Arm
Connect the power to the weapon.
- Mounting: Attach the slave syringe to the arm and the base.
- Range of Motion: Test the movement. Does it lift high enough? Does it push hard enough?
- Adjustment: You may need to adjust the mounting points for optimal leverage.
8. Step 8: Mounting the System to the Stand
Final assembly.
- Stability Check: Ensure the whole robot is stable.
- Control: Test the master syringe. Does it feel responsive?
- Safety: Double-check all connections. A burst tube during a match is a disaster.
Narrative Hook: You’ve built the robot, but will it survive the first match? The answer lies in the details of your friction management and air removal. We’ll explore how to troubleshoot these issues in the next section.
For more detailed building tutorials, check out our DIY Robot Building section.
⚖️ Official Judobot Match Rules and Safety Regulations
Every good fight needs rules. In the world of Hydraulic Judo Bots, the goal is simple: push the opponent out of the ring or flip them over.
Match Format
- Ring Size: Typically a 10×10 inch square.
- Time Limit: 2 minutes per match.
- Wining Conditions:
- Opponent’s base touches the floor outside the ring.
- Opponent is flipped onto their back.
- Opponent stops moving for 10 seconds.
Safety First
- Eye Protection: Always wear safety glasses. Even water under pressure can sting.
- Supervision: Minors should be supervised by an adult.
- No Sharp Edges: Ensure all parts are smooth to prevent injury.
- Fluid Safety: Use only water or non-toxic fluids. No corrosive chemicals.
Fair Play
- No External Power: The robot must be self-contained.
- No Tampering: Do not modify the opponent’s robot.
- Respect: Shake hands (or paws) before and after the match.
For a full list of competition rules, visit our Robot Combat Rules and Regulations page.
🎓 Presenting Your Hydraulic Robot Project to the Class
Building the robot is only half the battle. Presenting your project is where you showcase your engineering prowess.
Key Presentation Points
- The Problem: What challenge did you solve? (e.g., “How to lift heavy objects with minimal force?”)
- The Solution: Explain your hydraulic system.
- The Process: Show your design iterations and troubleshooting.
- The Results: Demonstrate the robot in action.
Tips for Success
- Visual Aids: Use diagrams to explain Pascal’s Law.
- Live Demo: Nothing beats a live demonstration.
- Q&A: Be prepared to answer questions about pressure, force, and materials.
Did you know? Presenting your project can inspire others to get into STEM. Your hydraulic robot could be the spark that ignites a future engineer’s passion!
🚀 Advanced Techniques: Boosting Torque and Speed
Once you’ve mastered the basics, it’s time to take your robot to the next level.
Increasing Torque
- Larger Slave Syringe: Increase the surface area of the output cylinder.
- Longer Lever Arm: Extend the distance between the pivot and the attachment point.
- Multiple Cylinders: Use two or more slave syringes in parallel for more force.
Increasing Speed
- Smaller Slave Syringe: Decrease the surface area for faster movement.
- Larger Master Syringe: Push more fluid per stroke.
- Reduced Friction: Polish pivot points and use high-quality tubing.
Hybrid Systems
Combine hydraulics with electric motors for a versatile robot. Use hydraulics for the main weapon and electric motors for movement.
🏆 Troubleshooting Common Hydraulic Leaks and Failures
Even the best-built robots have issues. Here’s how to fix them.
Common Issues
- Leaking Tubing: Check for cracks or loose connections. Replace the tubing if necessary.
- Air Bubbles: Tap the tubing to move bubbles to the top and push them out.
- Sticky Movement: Lubricate the pivot points and syringe plungers.
- Weak Force: Check for air in the system or ensure the syringes are the correct size ratio.
Maintenance Tips
- Inspect Regularly: Check for wear and tear before every match.
- Clean Fluids: Use distilled water to prevent mineral buildup.
- Store Properly: Keep the robot in a dry place to prevent rust.
💡 Real-World Applications: From BattleBots to Industrial Arms
Hydraulic systems aren’t just for fun and games. They are the backbone of modern industry.
Industrial Robotics
- Assembly Lines: Hydraulic arms move heavy parts with precision.
- Construction: Excavators and cranes use hydraulics to lift tons of material.
- Aerospace: Hydraulic systems control landing gear and flight surfaces.
Combat Robotics
- BattleBots: Many top-tier robots use hydraulic flippers and lifters.
- Robot Wars: The UK’s Robot Wars featured iconic hydraulic weapons.
Connection: The principles you learn building a Judo Bot are the same ones used to build the machines that build our world.
👥 Community Spotlight: Projects Made by Enthusiasts
The Robot Fighting™ community is full of talented builders. Here are a few standout projects:
- The “Hydra” Lifter: A student-built robot that uses a dual-cylinder system to flip 2-pound opponents.
- The “Syringe Slinger”: A robot that uses a rapid-fire hydraulic system to push opponents out of the ring.
- The “CrunchLabs” Champion: A team that won the Squirrel Showdown competition with a perfectly balanced design.
🏅 The Ultimate Hydraulic Robot Design Contest
Ready to test your skills? Enter the Ultimate Hydraulic Robot Design Contest!
Categories
- Best Design: Most innovative use of hydraulics.
- Most Powerful: Highest lifting capacity.
- Best Strategy: Most effective match performance.
How to Enter
- Build your robot.
- Record a video of your match.
- Submit your entry to the contest portal.
Prize: Winners get featured on our Robot Combat Videos page and a chance to win exclusive Robot Fighting™ merchandise!
🎨 Visual Effects and STEM Education Student Challenge
For educators and students, the Visual Effects and STEM Education Student Challenge offers a unique opportunity to combine robotics with creative storytelling.
Challenge Overview
- Goal: Create a robot that performs a specific task (e.g., lifting, pushing) and document the process with visual effects.
- Judging Criteria: Creativity, technical skill, and educational value.
Resources
- 3D Files: Download models from Thingiverse.
- Instructions: Follow the detailed PDF guides.
- Support: Contact CrunchLabs for assistance.
Inspiration: “Select a subscription and start your CrunchLabs journey of science and engineering education!” – CrunchLabs
📚 Recommended Links for Builders and Fans
Here are some essential resources for your hydraulic robot journey:
- CrunchLabs Squirrel Showdown: CrunchLabs Official
- Thingiverse 3D Files: Thingiverse
- Hydraulic Syringes: Amazon
- Vinyl Tubing: Amazon
❓ Frequently Asked Questions About Robot Fighting Hydraulics
How does hydraulic pressure affect the strength of robot weapons?
Hydraulic pressure directly correlates to the force exerted by the weapon. Higher pressure (achieved by smaller master syringes or stronger pumps) results in greater torque and lifting power. However, it also requires stronger materials to withstand the stress.
What are common hydraulic failures in battle robots and how to fix them?
Common failures include leaks, air bubbles, and seal degradation.
- Leaks: Replace damaged tubing or tighten connections.
- Air Bubbles: Bled the system by tapping and pushing fluid.
- Seal Degradation: Replace worn seals or use better quality syringes.
Can hydraulic-powered robots compete in Robot Fighting League events?
Yes! Many BattleBots and Robot Wars competitors use hydraulic systems. However, they must adhere to specific safety regulations and weight classes.
How to maintain hydraulic systems in combat robots?
- Regular Inspections: Check for leaks and wear.
- Fluid Replacement: Change the fluid periodically to prevent contamination.
- Lubrication: Keep moving parts well-lubricated.
What are the advantages of hydraulic weapons in robot fighting?
- High Torque: Capable of lifting heavy opponents.
- Smooth Control: Precise movement compared to electric motors.
- Durability: Can withstand high impact forces.
Can hydraulic robots compete in the Robot Fighting League?
Absolutely. As long as they meet the safety and weight requirements, hydraulic robots are a staple in the league.
What safety precautions are needed when using hydraulics in robot battles?
- Eye Protection: Always wear safety glasses.
- Supervision: Minors must be supervised.
- No Corosive Fluids: Use only water or non-toxic fluids.
- Secure Connections: Ensure all tubing is tightly connected.
How do you build a hydraulic arm for a fighting robot?
- Select syringes and tubing.
- Build a frame with a pivot point.
- Attach the slave syringe to the arm.
- Fill with water and remove air.
- Test and adjust.
What are the best hydraulic components for robot combat?
- Syringes: BD Luer-lock syringes.
- Tubing: High-quality vinyl tubing.
- Fluid: Distilled water or hydraulic oil (for pro builds).
How do hydraulic systems enhance robot fighting performance?
They provide instantaneous torque, smooth control, and high force, allowing for effective lifting, flipping, and pushing maneuvers.
How do hydraulics power robot fighting machines?
By converting fluid pressure into mechanical force through Pascal’s Law, driving cylinders that move weapons or limbs.
What is the best hydraulic fluid for combat robots?
For DIY, distilled water is best. For professional builds, hydraulic oil offers better lubrication and corrosion resistance.
Can hydraulics be used for weapon systems in robot fighting?
Yes, they are commonly used for flippers, lifters, and pushers.
How to prevent hydraulic leaks in battle bots?
- Use high-quality tubing and connectors.
- Ensure tight seals.
- Regularly inspect for wear.
What are the advantages of hydraulics over electric actuators in robot fighting?
- Higher Power-to-Weight Ratio.
- Smother Control.
- Better Impact Resistance.
How much pressure do robot fighting hydraulics typically operate at?
DIY systems typically operate at low pressure (10-50 PSI). Professional systems can reach hundreds of PSI.
Where can I buy hydraulic components for my fighting robot?
- Amazon: For syringes, tubing, and fittings.
- Local Hardware Stores: For basic materials.
- Specialty Robotics Suppliers: For high-end components.
🔗 Reference Links and Technical Sources
- CrunchLabs Squirrel Showdown: CrunchLabs Official
- Thingiverse 3D Files: Thingiverse
- Pascal’s Law Explanation: HyperPhysics
- Hydraulic System Design: Hydraulic Institute
- BattleBots Official Site: BattleBots
🏁 Conclusion

Building a hydraulic robot is more than just a science project; it’s a journey into the heart of engineering and combat strategy. From the simple craft sticks of a Judo Bot to the high-pressure systems of a BattleBot, the principles remain the same: force, leverage, and precision.
We started by asking why some robots lift effortlessly while others struggle. The answer lies in the hydraulic system—the careful balance of syringe sizes, fluid management, and structural integrity. We’ve explored the history, the science, the building process, and the advanced techniques that separate the amateurs from the champions.
Our Recommendation:
If you are new to robot fighting, start with the CrunchLabs Squirrel Showdown kit. It provides a solid foundation in hydraulics and mechanical design. For those ready to build from scratch, focus on air removal and friction management—these are the keys to victory.
Final Thought: Remember, every match is a learning opportunity. As the saying goes, “After each match, whether you win or lose, you’ll come away with more ideas on how to improve your design.” So grab your tools, fill your syringes, and get ready to smash!
Ready to build? Check out our DIY Robot Building section for more guides, or join the Robot Fighting™ community to share your creations!