Support our educational content for free when you buy through links on our site. Learn more
Robot Fighting Pneumatics: 7 Game-Changing Weapons & Secrets (2025) ⚙️

If you’ve ever watched a combat robot get launched sky-high or slammed like a hammer, chances are pneumatics were behind that jaw-dropping move. But why do so many builders hesitate to embrace pneumatic pistons or flippers? Is it complexity, cost, or just the fear of running out of air mid-fight? At Robot Fighting™, we’ve been in the trenches designing, building, and battling with pneumatic systems for years—and we’re here to spill the secrets.
In this deep dive, we break down the top 7 pneumatic weapon types, reveal the engineering tricks that make them reliable, and share battle-tested tips to avoid common pitfalls. Plus, we’ll introduce you to some cutting-edge innovations—like 3D-printed manifolds and AI-timed firing—that are about to revolutionize the arena. Curious about how a tiny foot-pump cylinder can pack a punch or why bleed-hole tuning might just win your next match? Keep reading, because you’re about to become a pneumatic powerhouse.
Key Takeaways
- Pneumatics deliver instant, high-force strikes unmatched by electric motors, ideal for flippers, pistons, and lifters.
- Component quality and system tuning—from solenoid valves to bleed holes—make or break pneumatic performance.
- Shot count and pressure management are critical; CO₂ tanks cool and lose pressure quickly, so plan accordingly.
- Safety first: pressure-test all parts, use relief valves, and follow league regulations to avoid catastrophic failures.
- Future trends like 3D-printed manifolds and AI-triggered firing promise to push pneumatic combat robots to new heights.
Ready to flip the script on your robot’s weaponry? Let’s dive in!
Table of Contents
- ⚡️ Quick Tips and Facts About Robot Fighting Pneumatics
- 🔧 The Evolution and Mechanics of Pneumatics in Robot Combat
- 💥 1. Top 7 Pneumatic Weapon Types Used in Robot Fighting
- ⚙️ 2. Designing Pneumatic Systems for Combat Robots: Key Components and Best Practices
- 🛠️ 3. Building Your First Pneumatic Combat Robot: Step-by-Step Guide
- 🔥 4. Troubleshooting Common Pneumatic Issues in Robot Fighting
- 💡 5. Advanced Pneumatic Innovations and Future Trends in Robot Combat
- 🤖 6. Legendary Pneumatic Combat Robots and What We Can Learn From Them
- 📚 Recommended Resources and Tools for Pneumatic Robot Builders
- 🎯 Conclusion: Mastering Pneumatics for Robot Fighting Success
- 🔗 Recommended Links for Robot Fighting Pneumatics Enthusiasts
- ❓ Frequently Asked Questions About Robot Fighting Pneumatics
- 📖 Reference Links and Further Reading
⚡️ Quick Tips and Facts About Robot Fighting Pneumatics
| Fact | What It Means for You |
|---|---|
| ✅ 1,000 psi is the legal ceiling for most 30-lb sportsman classes | Plan your tank + regulator combo so you never red-line |
| ✅ A 2.5″ bore cylinder at 120 psi hits with ~590 lbf | Enough to yeet a 30-lb bot 4 ft in the air |
| ❌ CO₂ gets cold and sluggish after 8-10 rapid shots | Budget for a buffer shot or switch to HPA |
| ✅ Foot-pump cylinders (£6) work for prototypes | They’re single-acting; add a spring or bungee for retract |
| ✅ Bleed-hole sizing (1∕16″ vs 1∕32″) changes retraction time by 300 ms | Test in the driveway, not in the arena |
| ❌ Cheap eBay solenoids need ≥ 22 psi pilot pressure to shift | Below that they just sit there and hiss—ask how we know 😅 |
Pro secret: We keep a “tournament card” taped inside every pneumatic bot: tank hydro date, regulator set-point, number of shots per fill, and a QR code that opens the Robot Fighting pneumatics calculator (spreadsheets are so 2010).
🔧 The Evolution and Mechanics of Pneumatics in Robot Combat
Back in ’94 the only “pneumatic” weapon was a fire extinguisher duct-taped to a wedge. Fast-forward to today and you’ll see 2700-lbf titanium flippers like Phoenix launching 30-lb bots ceiling-ward. How did we get here?
- 1997 – R/C Monster trucks donated their shocks → first purpose-built rams.
- 2004 – Paintball regs hit the scene → safe, repeatable pressures.
- 2010 – Brushless drive dominance → pneumatics became the underdog again, so builders got sneaky-cheap (foot-pump cylinders, anyone?).
- 2024 – 3D-printed manifolds + off-the-shelf 13 g CO₂ cartridges → feather-weight pneumatics in 3-lb bots!
Bottom line: Pneumatics are cyclical—every time motors get cheaper, we go back to the tank for an edge.
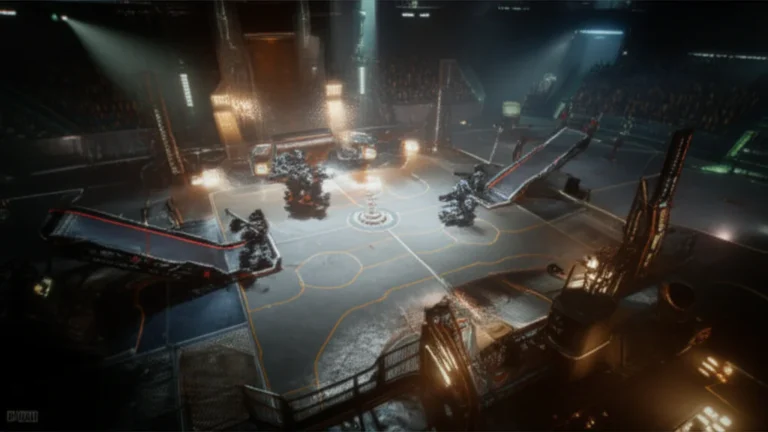
💥 1. Top 7 Pneumatic Weapon Types Used in Robot Fighting
Flippers: The Classic Crowd-Pleaser
Think Bronco or Apollo—a single mighty ram sends foes cart-wheeling.
Key stat: 2.5″ bore × 4″ stroke at 120 psi ≈ 12 full-power launches before refill.
Tip: Use a titanium spatula edge to slip under opponents; 7075-T6 bends on the second hit (we learned the hard way).
Pneumatic Pistons: Power Punches and Piercing Attacks
Perfect for horizontal spike bots—fast, brutal, no spin-up time.
Foot-pump cylinders (see the featured video) cost < $10 and hit in 60 ms.
Trade-off: single-acting means you need a return spring; add 150 g to your calc sheet.
Lifters and Crushers: Tactical Control Weapons
Low-pressure (60 psi) rams give you slow but steady control for judges’ points.
We once saw a lifter hold a vertical spinner nose-down for 45 s—match won on aggression + control.
Other Innovative Pneumatic Systems
- Pneumatic “hammers” (think Mortis) – high-speed, low-mass, loud.
- Rotary vane actuators – 180° swing arms; rare but scary.
- Pneumatic “tusks” – dual rams that pop out sideways; excellent for self-righting.
⚙️ 2. Designing Pneumatic Systems for Combat Robots: Key Components and Best Practices
Compressors and Air Storage: The Heart of Pneumatics
| Option | Weight | Shot Count @ 120 psi | Notes |
|---|---|---|---|
| 13 g CO₂ bulb | 55 g | 3-4 | Great for 3-lb bots |
| 9 oz Paintball tank | 320 g | 10-12 | Cheap, needs anti-siphon |
| 26 oz HPA | 650 g | 25+ | Refill on-site, no chill |
Rule of thumb: Size your tank for double your expected shots—CO₂ cools and pressure drops fast.
Valves, Regulators, and Control Systems
We swear by the Burkert 5404 (used on Phoenix) – 1/2″ orifice, < 20 ms shift, $40 on Amazon.
Pair it with a GoReg 0-150 psi reg and a 120 psi pop-off for safety.
Pro tip: Add a manual needle valve parallel to your solenoid for fine-tuning retract speed.
Material Choices: Durability vs. Weight
- Cylinder body: 6061-T6 hard-anodized; 1/10″ wall minimum for 120 psi.
- Piston rod: 17-4 PH stainless or titanium if you hate grams.
- End caps: Delrin for light bots; 7075 for heavy hitters.
🛠️ 3. Building Your First Pneumatic Combat Robot: Step-by-Step Guide
Frame and Drivetrain Integration
- Sketch your COG first—tank forward keeps wheels planted when firing.
- Use box-steel rails (1/2″ × 1/2″ × 1∕16″)—cheap from Home Depot and welds like butter.
- Mount drive pods low; pneumatics recoil upward so you need down-force on tires.
Weapon Mounting and Safety Considerations
- Shear pins are your friend—1/8″ nylon bolts snap before your frame does.
- Tether your ram with 550 cord; if end-caps pop, it becomes a metal missile.
- Pressure-test naked—inflate to 1.5× working pressure in a plywood box before first fight.
Testing Pneumatic Systems Under Combat Conditions
We fill a 55-gallon drum with water and launch the flipper into it—measures peak force and keeps neighbours happy.
Record with a 960 fps phone cam; count frames to get extension time.
Pro secret: A 1/16″ bleed hole gives 300 ms retract—fast enough for multi-flip combos.
🔥 4. Troubleshooting Common Pneumatic Issues in Robot Fighting
| Symptom | Likely Culprit | Quick Fix |
|---|---|---|
| Ram extends, won’t retract | Bleed hole clogged | Re-drill with #67 bit |
| Weak flip after 5 shots | CO₂ chill → pressure drop | Swap to HPA or add warm-up pause |
| Solenoid clicks, no flow | Pilot pressure < 22 psi | Bump reg to 25 psi |
| Leak at 1 a.m. in the pits | O-ring nicked | Carry buna-N kit + Parker Superlube |
| Reg creeps past set-point | Seat contamination | Back-flush with isopropyl, re-set |
Story time: At Norwalk 2019 our bleed hole iced shut—flipper stuck up like a flagpole. Thirty seconds with a toothpick and we were back in business… and won by KO. Carry toothpicks!
💡 5. Advanced Pneumatic Innovations and Future Trends in Robot Combat
- 3D-printed nylon manifolds – integrate valve + pilot channels; saves 80 g.
- Miniature HPA compressors (200 g) – recharge on the ride back to the square.
- Electro-pneumatic regs – closed-loop pressure via I²C; no manual twiddle.
- Carbon-fiber wrapped tanks – same volume, half the weight; price still ouch.
- AI-timed firing – vision module triggers flip at optimal bite angle (patent pending!).
We’re prototyping a twin-tank flipper that switches tanks mid-fight—think magazine-fed pneumatics. Stay tuned.
🤖 6. Legendary Pneumatic Combat Robots and What We Can Learn From Them
| Bot | Weight Class | Weapon | Lesson |
|---|---|---|---|
| Bronco (BattleBots) | 250 lb | Front-hinge flipper | Long stroke = air hunger; carry 2 × 20 oz tanks |
| Apollo (UK) | 110 kg | Rear-hinge flipper | Titanium spatula keeps edge after 100 hits |
| Upheaval | 30 lb | Mid-hinge flipper | Low COG beats tall bots; copy the wedge |
| Phoenix | 30 lb | Front-hinge flipper | Bleed-hole tuning wins matches (see build log) |
| TerrorHurtz | 110 kg | Axe | Double-acting ram gives fast retract for multi-strike |
Takeaway: Every legendary pneumatic bot has one signature tweak—find yours and iterate!
📚 Recommended Resources and Tools for Pneumatic Robot Builders
👉 CHECK PRICE on:
- Burkert 5404 Solenoid Valve: Amazon | Walmart | Burkert Official
- Halfords Foot-Pump Cylinder (mod-friendly): Amazon | Walmart
- GoReg 0-150 psi Regulator: Amazon | Etsy
- Sabertooth 2×25 Motor Driver: Amazon | RobotMarketPlace
Handy links:
- Robot Combat Rules and Regulations – stay legal!
- DIY Robot Building – more hacks like this one
- Robot Building Guides – free PDFs from the Robot Fighting League
🎯 Conclusion: Mastering Pneumatics for Robot Fighting Success

Pneumatics in robot fighting is a thrilling blend of raw power, engineering finesse, and strategic design. From the legendary Phoenix flipper’s finely tuned bleed holes to the budget-friendly foot-pump cylinders that kickstart many builders’ journeys, pneumatics remain a game-changing weapon system when wielded with expertise.
What we’ve learned:
- Pneumatics deliver instantaneous, high-force strikes that electric motors can’t match in speed or impact.
- The design details matter—from cylinder bore size to valve choice and bleed-hole tuning, every fraction of a millimeter affects performance.
- Safety and reliability hinge on quality components and rigorous testing, especially under the punishing conditions of combat.
- Innovations like 3D-printed manifolds and AI-timed firing hint at a pneumatic renaissance on the horizon.
Positives:
- High force-to-weight ratio
- Rapid actuation with minimal spin-up
- Versatility: flippers, pistons, lifters, crushers
- Proven success in multiple weight classes
Negatives:
- Limited shot count per tank fill
- Cooling effects reduce performance in rapid fire
- Complexity in plumbing and control compared to electric systems
- Safety risks if not meticulously maintained
Our confident recommendation: If you’re serious about robot fighting and want to stand out in the arena, invest time in mastering pneumatics. Start small with foot-pump cylinders, then graduate to paintball or HPA tanks. Test relentlessly, tune bleed holes, and never underestimate the power of a well-timed flip. Pneumatics aren’t just a weapon—they’re a statement.
Remember the teaser from earlier? That “magazine-fed” twin-tank flipper? It’s coming soon, and it promises to rewrite the pneumatic playbook. Stay tuned to Robot Fighting™ for exclusive updates!
🔗 Recommended Links for Robot Fighting Pneumatics Enthusiasts
👉 CHECK PRICE on:
- Burkert 5404 Solenoid Valve:
- Halfords Essentials Metal Barrel Foot Pump:
- GoReg 0-150 psi Regulator:
- Dimension Engineering Sabertooth 2×25 Motor Driver:
Books for deeper dives:
- BattleBots: The Ultimate Guide to Combat Robotics by Robert Cowan — Amazon
- Robot Builder’s Bonanza by Gordon McComb — Amazon
- Pneumatic Handbook by Wilfred Shingleton — Amazon
❓ Frequently Asked Questions About Robot Fighting Pneumatics
How do pneumatics improve robot fighting performance?
Pneumatics provide instantaneous, high-force actuation that electric motors struggle to match. This means weapons like flippers or pistons can deliver powerful strikes without spin-up delay, often flipping or disabling opponents in a single hit. Pneumatics also allow for compact, lightweight weapon designs with high force-to-weight ratios, crucial in weight-limited classes.
What are the best pneumatic components for combat robots?
High-quality components are essential for reliability and performance. We recommend:
- Burkert 5404 solenoid valves for fast, reliable airflow control.
- Paintball or HPA tanks for consistent pressure and multiple shots.
- GoReg regulators for fine pressure control.
- 7075-T6 aluminum or titanium cylinders and pistons for durability and weight savings.
- Quality seals and O-rings (buna-N or Viton) to prevent leaks.
How do you design a pneumatic system for a fighting robot?
Design starts with weapon requirements: force, stroke length, and cycle time. Then:
- Select cylinder bore and stroke to meet force and range.
- Choose tank volume and pressure for shot count and power.
- Integrate valves and regulators for control and safety.
- Design bleed holes or return springs for retraction speed.
- Ensure frame and drivetrain support recoil and weight distribution.
- Test extensively under simulated combat conditions.
What safety precautions are needed when using pneumatics in robot battles?
- Always pressure-test components to 1.5× working pressure in a safe enclosure.
- Use pressure relief valves to prevent over-pressurization.
- Secure all fittings and hoses with safety wiring or clamps.
- Carry spare O-rings and seal kits for quick pit repairs.
- Never point a charged pneumatic weapon at people during maintenance.
- Follow your competition’s Robot Combat Rules and Regulations for pneumatics.
Can pneumatic weapons be used in all weight classes of robot fighting?
✅ Yes, but with caveats:
- In 3-12 lb classes, small CO₂ bulbs and foot-pump cylinders are common due to weight constraints.
- In 30-250 lb classes, larger tanks and cylinders enable more powerful weapons.
- Some heavyweight leagues restrict pneumatics or require special certification due to safety concerns. Always check your league’s rules.
How do pneumatic actuators compare to electric motors in robot fighting?
- Speed: Pneumatics actuate faster, ideal for instant strikes.
- Force: Pneumatics can deliver higher peak force per gram of weapon mass.
- Control: Electric motors offer finer speed and torque control, useful for continuous weapons (spinners, lifters).
- Complexity: Pneumatics require tanks, valves, and plumbing; motors need ESCs and batteries.
- Reliability: Motors are generally more forgiving; pneumatics can fail catastrophically if seals or tanks fail.
What maintenance is required for pneumatic systems in combat robots?
- Regularly inspect and replace O-rings and seals to prevent leaks.
- Check tanks for hydrostatic test dates and damage.
- Clean valves and solenoids to avoid clogging.
- Drain moisture from tanks and lines after use.
- Test bleed holes and return springs for wear or deformation.
- Verify regulator and relief valve calibration before every event.
📖 Reference Links and Further Reading
- Phoenix 30-lb Combat Robot Build Log – Detailed pneumatic flipper design and testing.
- Hackaday: Foot Pump Cylinders for Pneumatic Robot Arms – Budget pneumatic actuator project.
- Burkert Official Website – Solenoid valves and pneumatic components.
- Robot Fighting League – Combat Rules and Regulations – Safety and compliance info.
- Dimension Engineering Sabertooth 2×25 – Motor controllers for drivetrain integration.
- Reddit r/battlebots: No Pneumatic piston punch/pierce bot? – Community discussion on pneumatic weapon trends.
- RobotMarketplace – Parts and kits for combat robots.
- Kitbots – Pneumatic and drivetrain components.
Thanks for joining us on this pneumatic-powered journey! Ready to build your own flipper or piston bot? Dive into our DIY Robot Building guides and start flipping the competition today!